
In electronic markets, prices do not reverse simply because an indicator reaches an overbought level. True reversals occur mechanically through Order Flow Absorption.
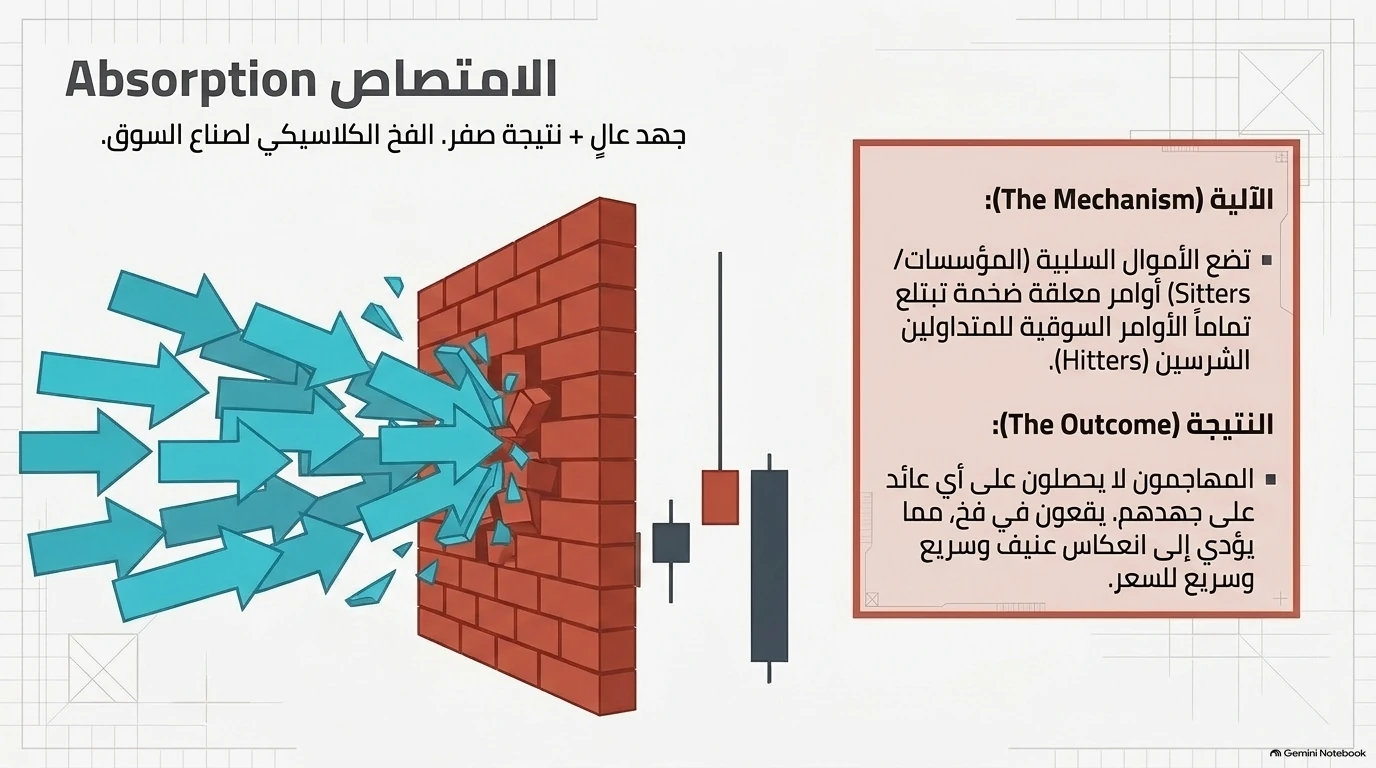
1. High Effort + Zero Result: The Classic Trap#
Absorption represents the starkest failure of Return on Effort: * Massive market orders hit a specific price level with extreme aggression. * Despite heavy volume, price fails to advance a single tick. * Passive limit orders quietly swallow every aggressive contract.
The Mechanism (الآلية): Passive smart money (Institutions / Sitters) places massive resting limit orders that completely absorb the incoming market orders of aggressive retail and momentum traders (Hitters). The Outcome (النتيجة): Attackers receive zero return on their effort. They become trapped, leading to a swift, violent price reversal as they are forced to liquidate.
2. Footprint Signature of Absorption#
When viewing an order flow Footprint chart, absorption leaves clear visual evidence: 1. Volume Clustering at Extremes: Unusually heavy volume concentrated on the extreme wick of the candle (e.g. at the day's high). 2. Extreme Delta Divergence: Heavy positive delta printed at candle highs, accompanied by a long upper wick. 3. Subsequent Trapping Bar: The next candle immediately breaks the low of the absorption cluster, locking trapped buyers on the wrong side of the market.
3. Absorption at Support vs. Resistance#
- Buying Absorption (At Resistance): Aggressive buyers lift the Ask with heavy size. An institutional seller absorbs the volume with passive limit sells. Once buyers exhaust their capital, the market plummets.
- Selling Absorption (At Support): Aggressive sellers dump market orders into the Bid. An institutional buyer absorbs every contract with passive limit bids. Once selling abates, price rallies sharply.
4. Execution Rules for Trading Absorption#
- Location First: Only trade absorption at major structural levels: Value Area High/Low, prior day high/low, or untested POCs. Never fade absorption in the middle of a range.
- Wait for the Shift: Never enter during the absorption candle itself. Wait for the confirmation candle to break the cluster low/high.
- Stop Placement: Place your protective stop 2–4 ticks beyond the absorption wick extreme.
Read our detailed companion essay: Order Flow Volume Absorption. Learn how to distinguish absorption from Order Flow Exhaustion and explore Entry Confirmation.
Return to the Order Flow Pillar Guide.