
Interpretive research — not financial advice
Trend Following — after the first 30-minute range breaks
Once price closes outside the first 30-minute range (IVB), a path completely different from mean reversion opens: trading only with the direction of the break, through three specific entry triggers.
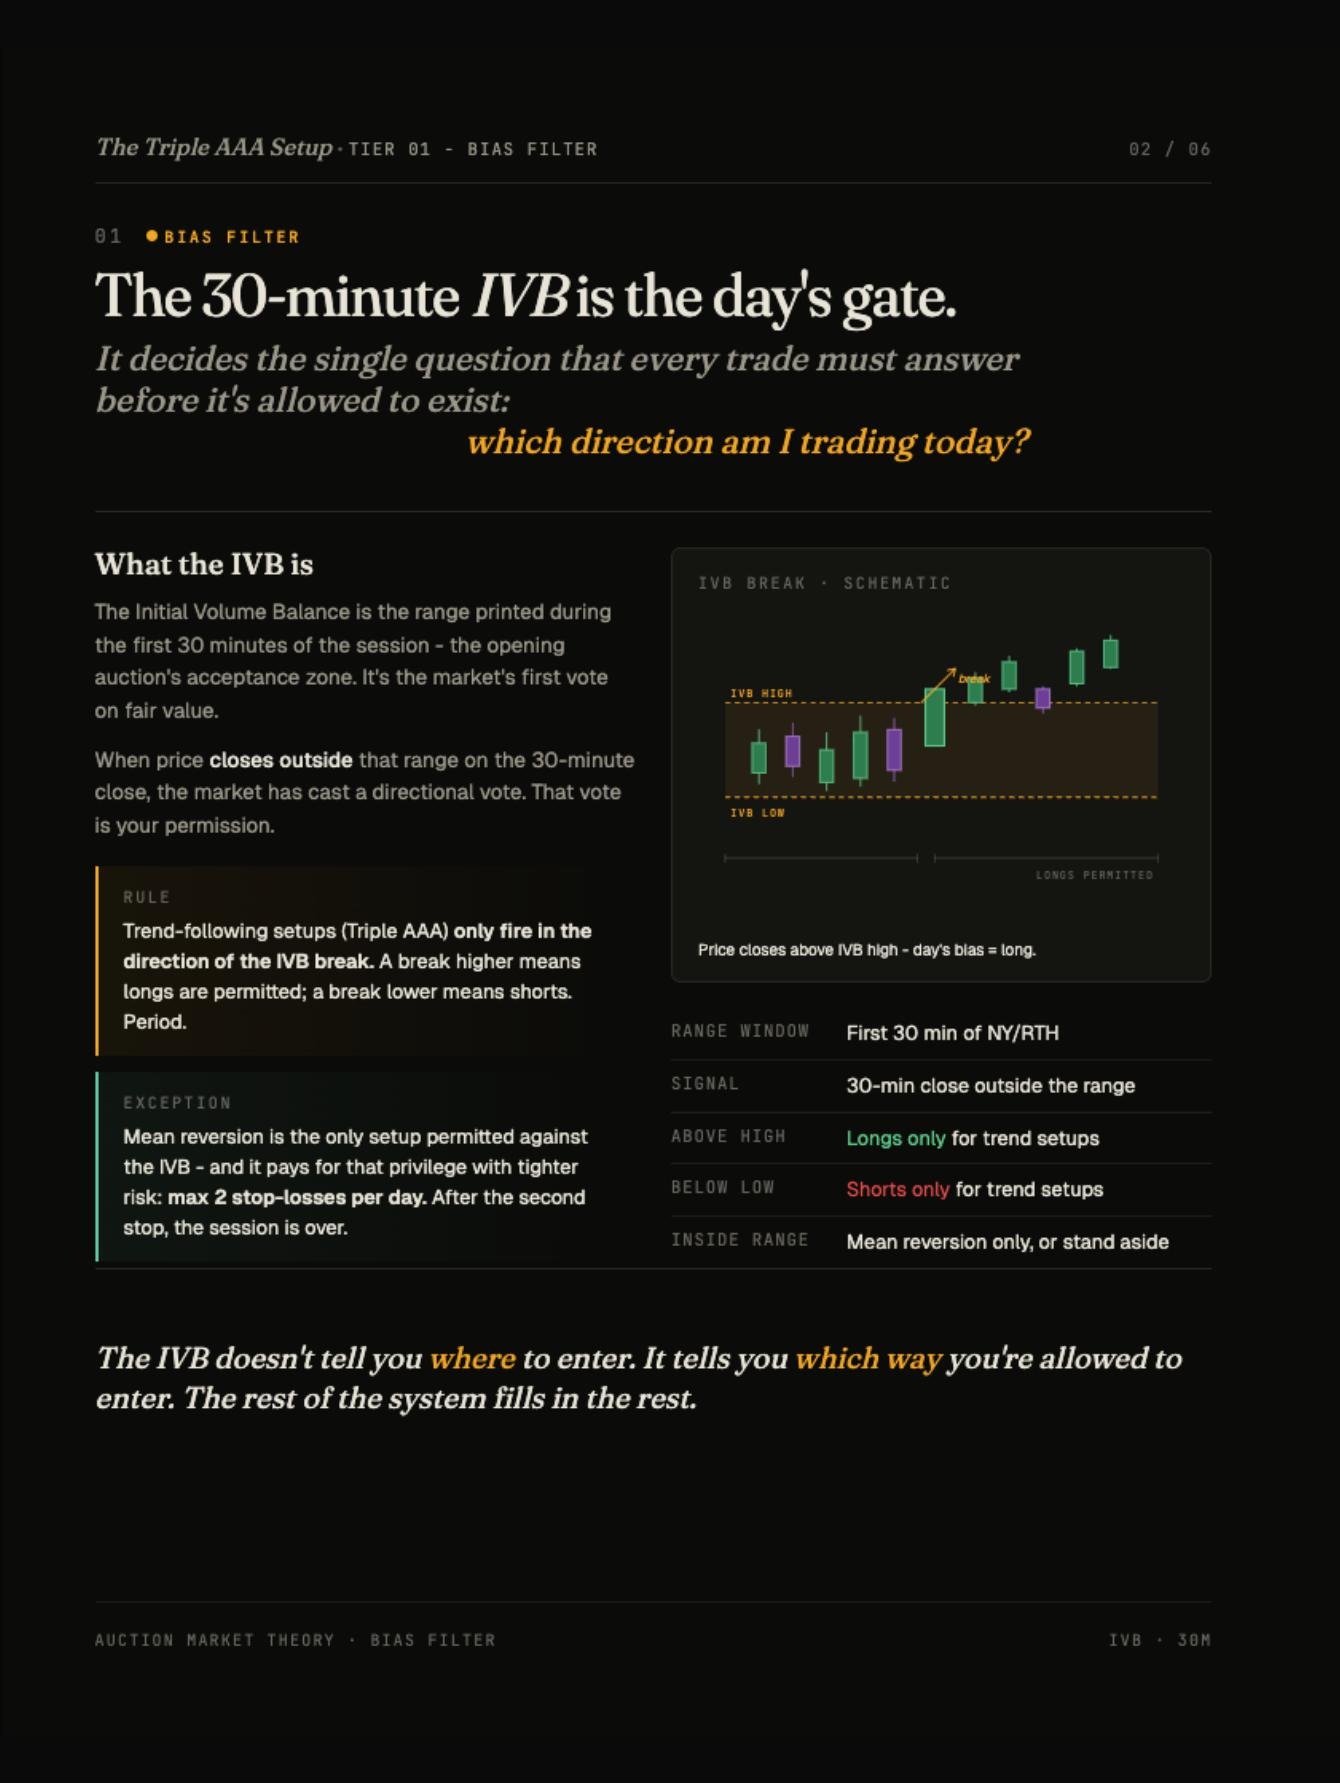
The trend declaration: breaking the first 30-minute range
A first-30-minute candle closing outside the IVB range is the official "declaration" of the day's direction — and only from it do trend-following trades open.
The fixed sequence: alignment → absorption → aggression
Every trigger in this setup follows the same three-part sequence: price moves with the break's direction (alignment), then the opposite side tries and fails at the retest (absorption), then the original side returns with larger size (aggression).
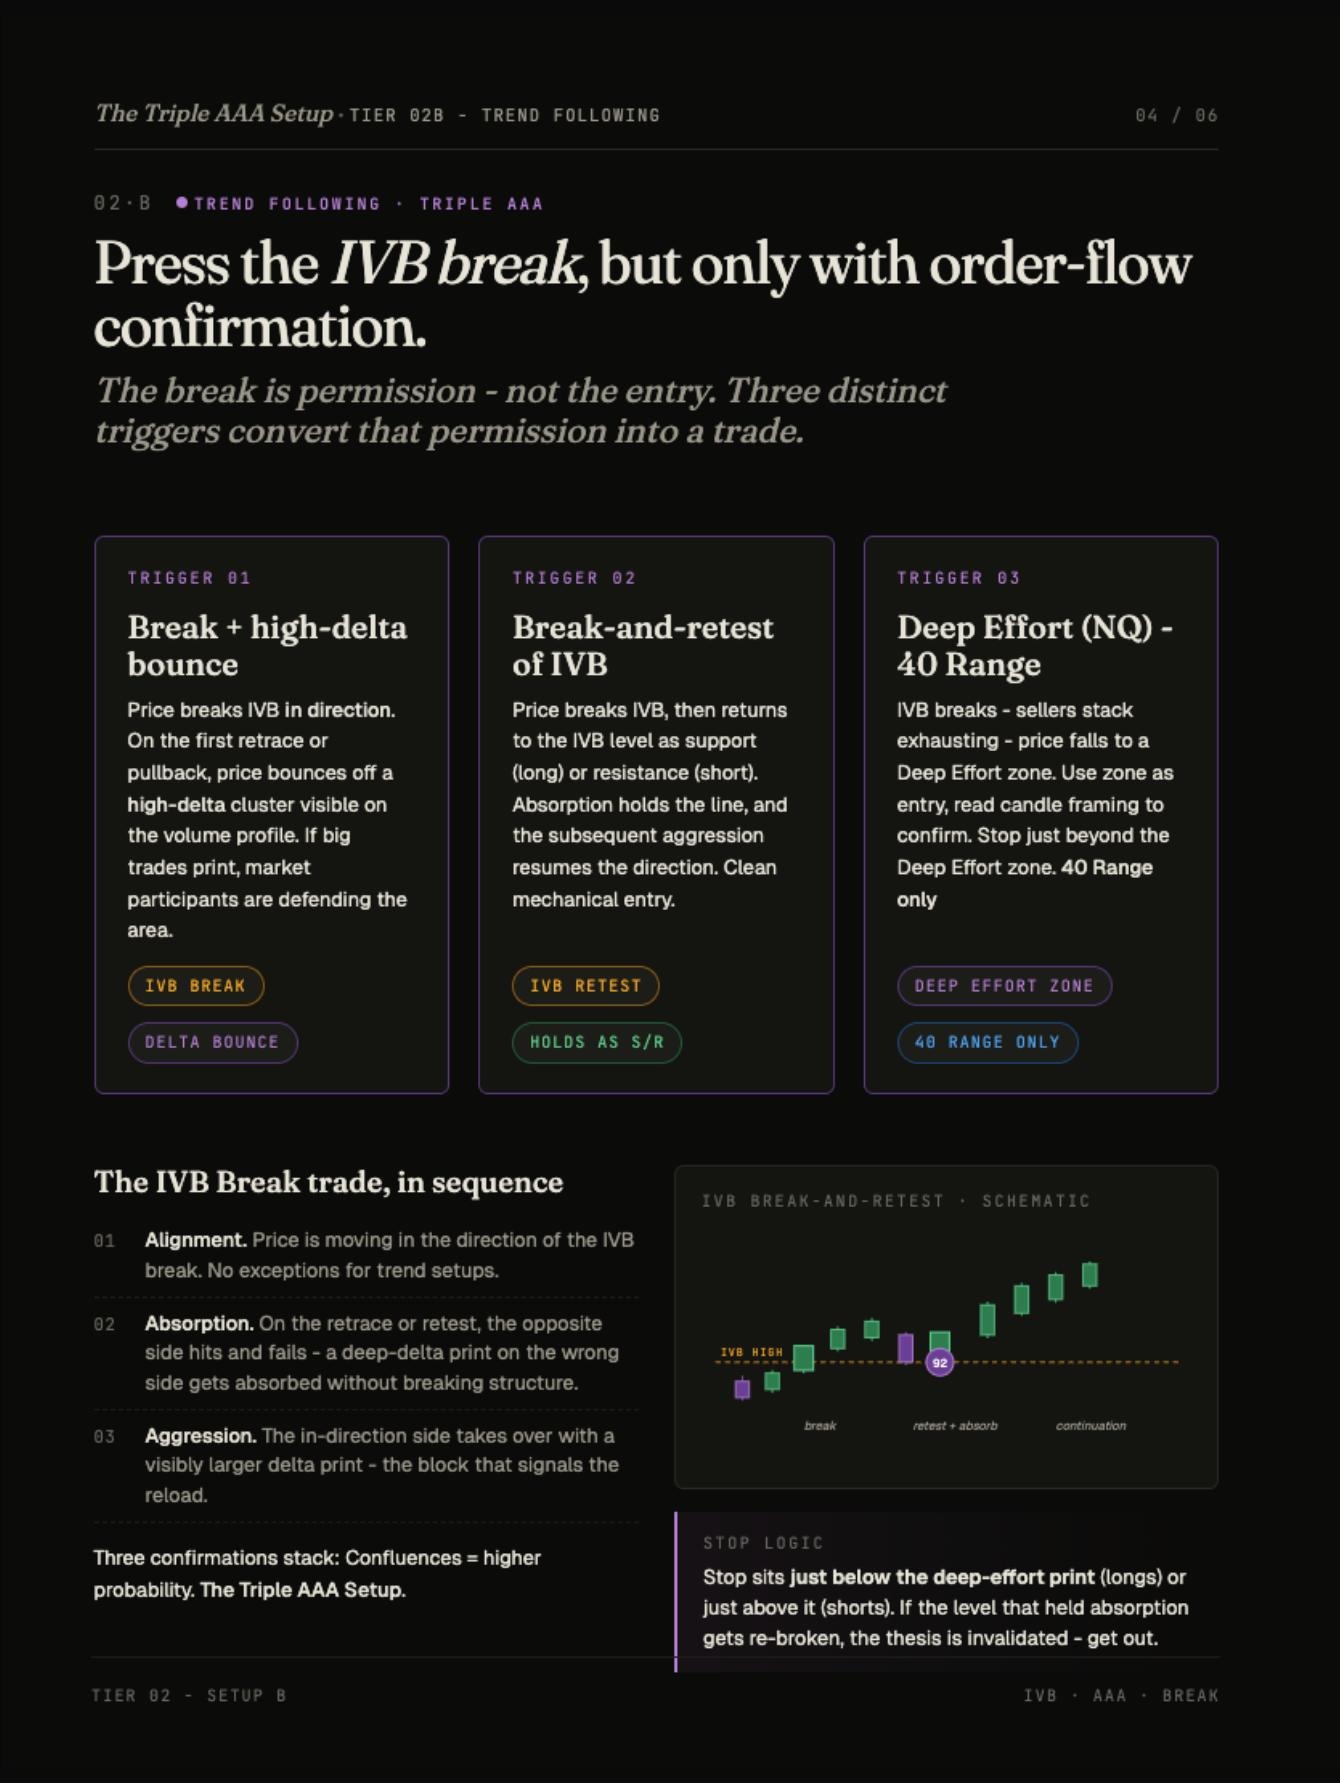
Break + bounce off a high delta cluster
The first correction after the break bounces off a large volume cluster on the profile — a sign that the large traders are defending the area.
Break then retest of the range
Price returns to the range level itself to act as support/resistance, absorption fixes the line, then aggression returns in the same direction. The cleanest mechanical entry.
A deep exhaustion zone (fine range)
After the break, the opposite side's orders exhaust and price drops to an exhaustion zone on a fine tick-range chart. Enter at the zone, stop just behind it.
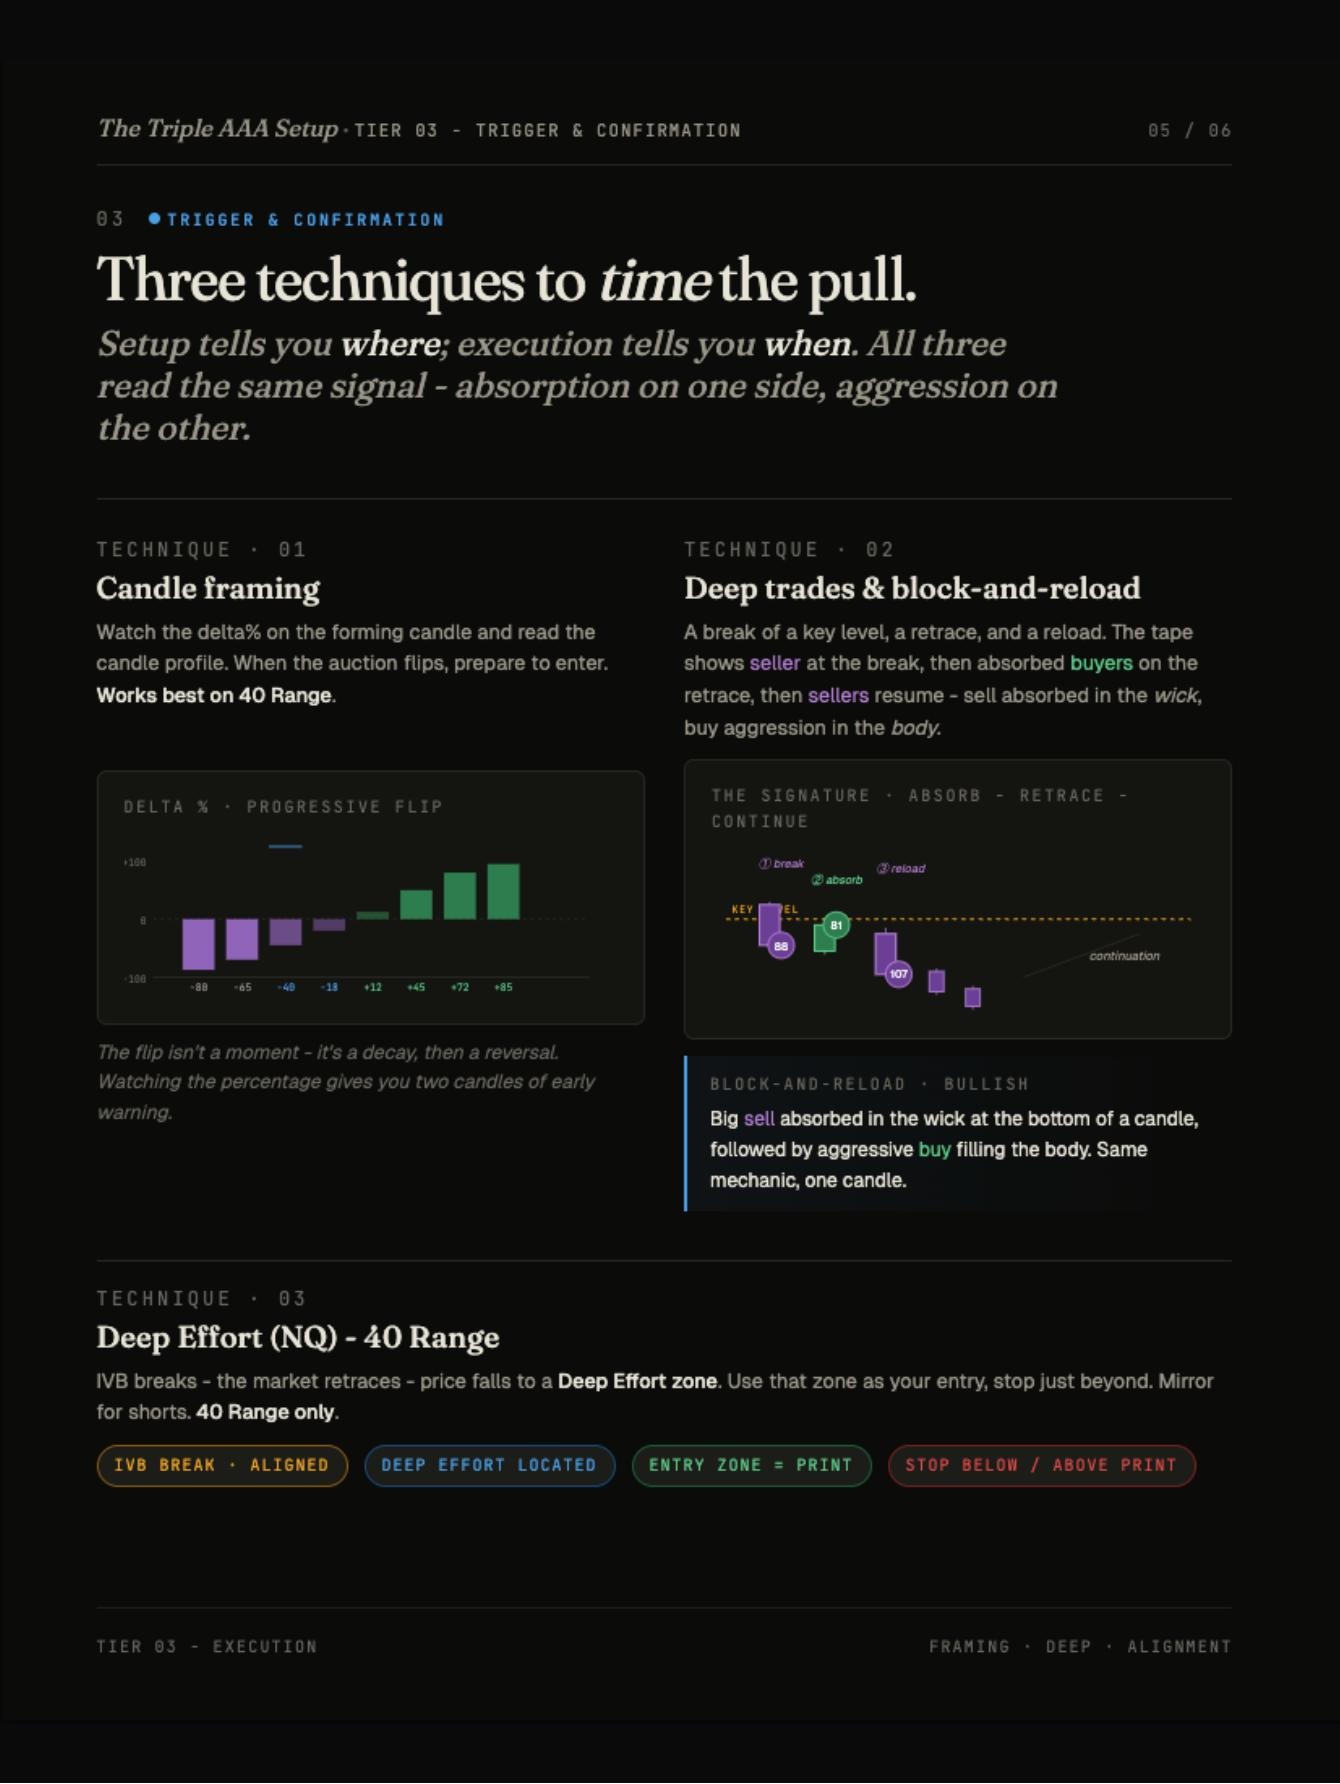
A detailed read of the execution techniques
A visual breakdown of how to read each trigger on the chart moment by moment: the changing delta percentage, and the "absorption → pullback → continuation" style.
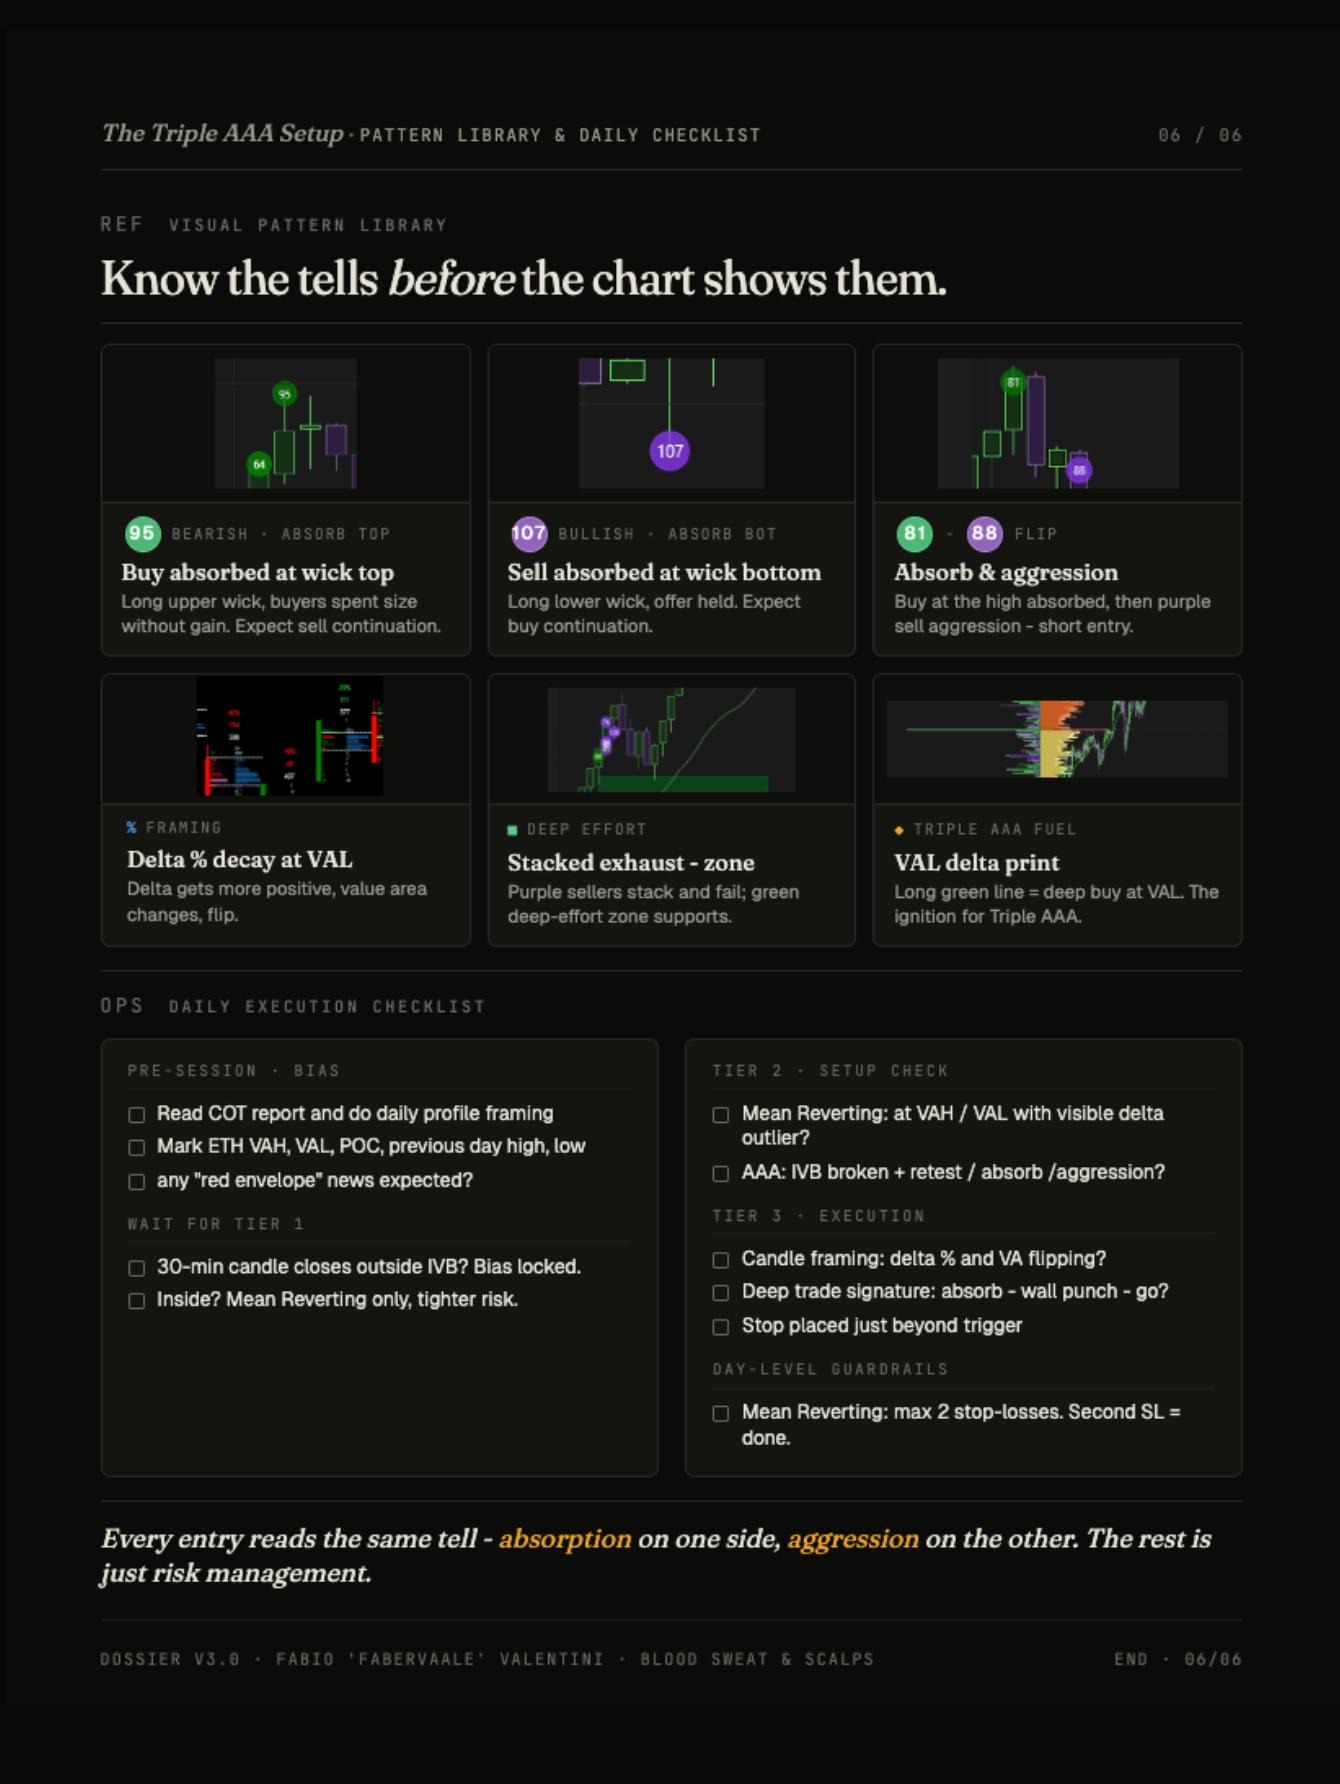
The reference pattern library
The patterns most relevant to this setup, from the same visual library used in the mean-reversion setup.
A quick reference for the three triggers
| Trigger | Condition | Stop | Target |
|---|---|---|---|
| Trigger 1 | Bounce off a high delta cluster after the break | Behind the bounce level | The next balance area |
| Trigger 2 | Retest of the range as support/resistance | Behind the range level | The next balance area |
| Trigger 3 | An exhaustion zone after the break (fine range) | Behind the exhaustion zone | The next balance area |
The A+ additional setup — the best return-to-risk