
Interpretive research — not financial advice
The A+ additional setup — the best return-to-risk
A third branch parallel to the mean-reversion and trend-following paths, considered the best in terms of return-to-risk because its stop is very small while the target is often further than the previous high/low.
The full setup cycle
A four-stage sequence: a break with clear size, a deep correction that goes all the way back toward the opposite edge of the value area, absorption there, then a launch stronger than the original move.
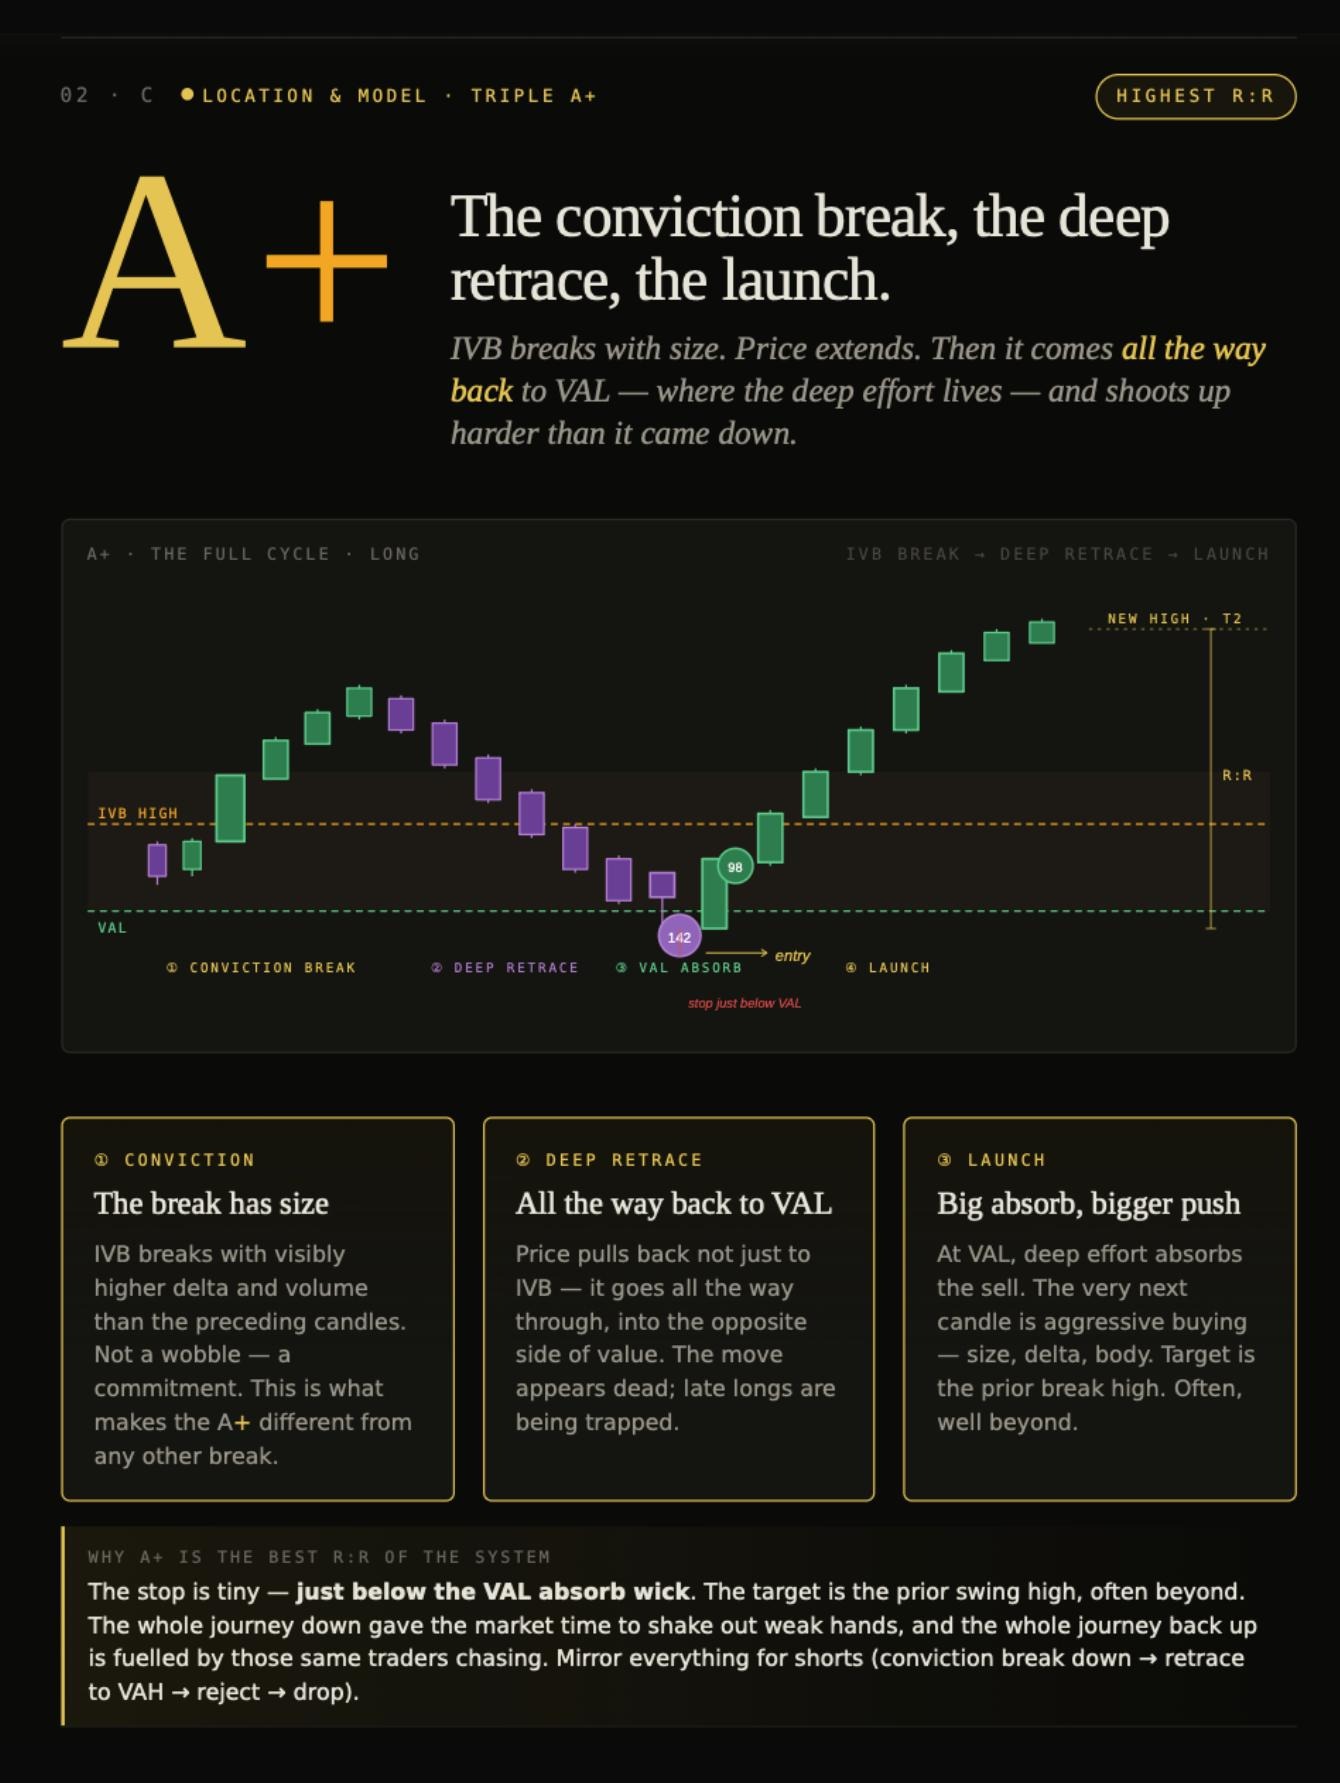
Why this is the best return-to-risk
The structural reason: the entry point is very close to the idea's invalidation point (the stop), while the target is relatively far — which gives a large risk-to-reward ratio when the absorption succeeds.
Clear volume and delta
Not any breakout will do — it must be accompanied by clear execution volume and delta that confirm the move's seriousness.
A return all the way back
Unlike the usual shallow corrections, price here returns all the way to the exact opposite edge of the value area.
Stronger than the original move
After absorption at the edge, the new launch is usually stronger in momentum than the first break, and targets breaking the previous high/low, often exceeding it.
The stop, the target and the sell-side mirror
- Stop
- Very small — just behind the absorption wick at the opposite edge
- Target
- The previous high/low before the correction, and often further than it
- The mirror (sell version)
- The same idea inverted: a downward break ← a deep correction to the upper edge of the value area ← rejection there ← a stronger drop
Index of all strategies